1. After logging into your Cloudflare account, please head over to Domain Registration > Manage Domains then click on the Manage button beside the domain you would like to authenticate: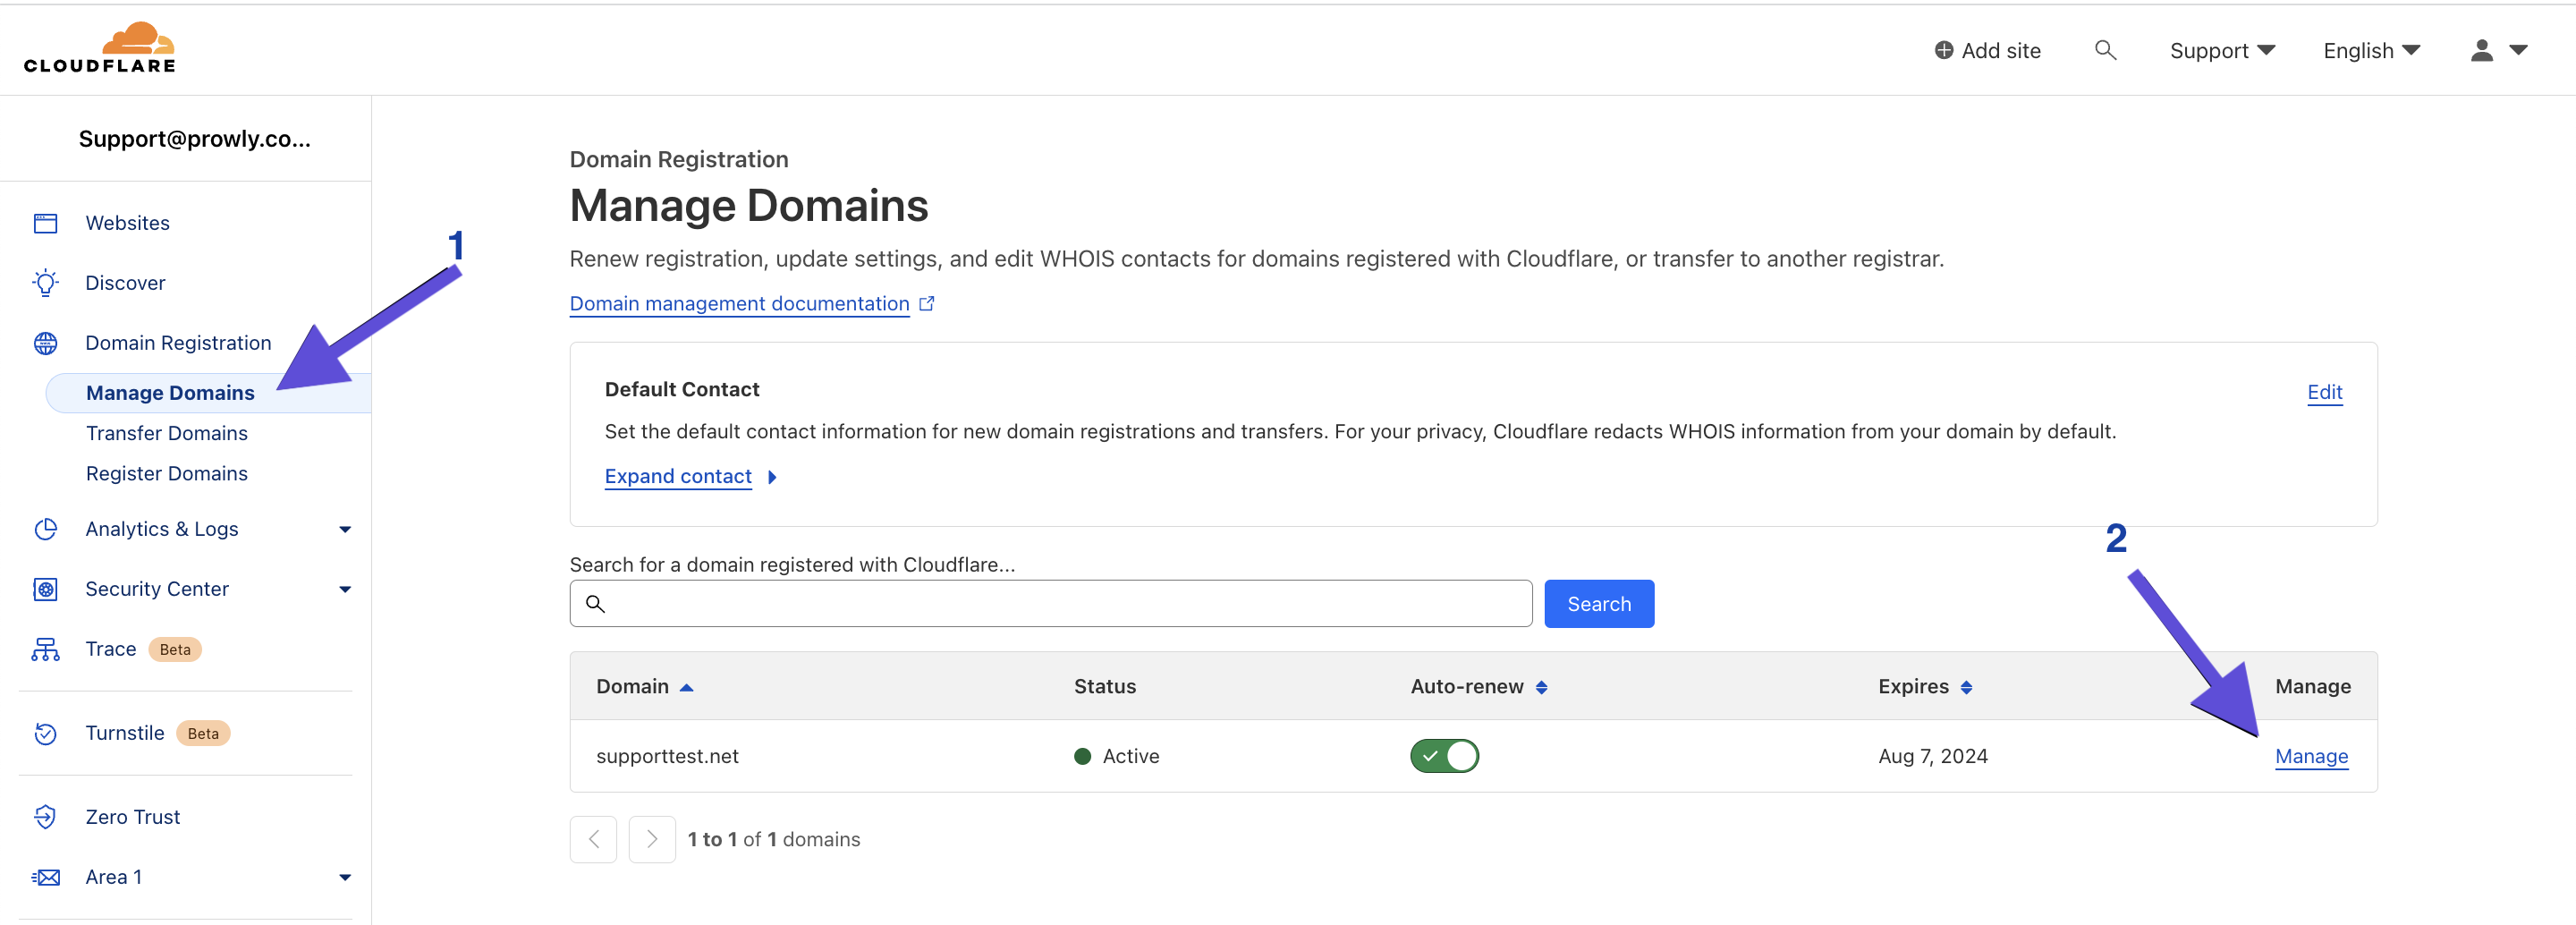
Then, select Update DNS configuration: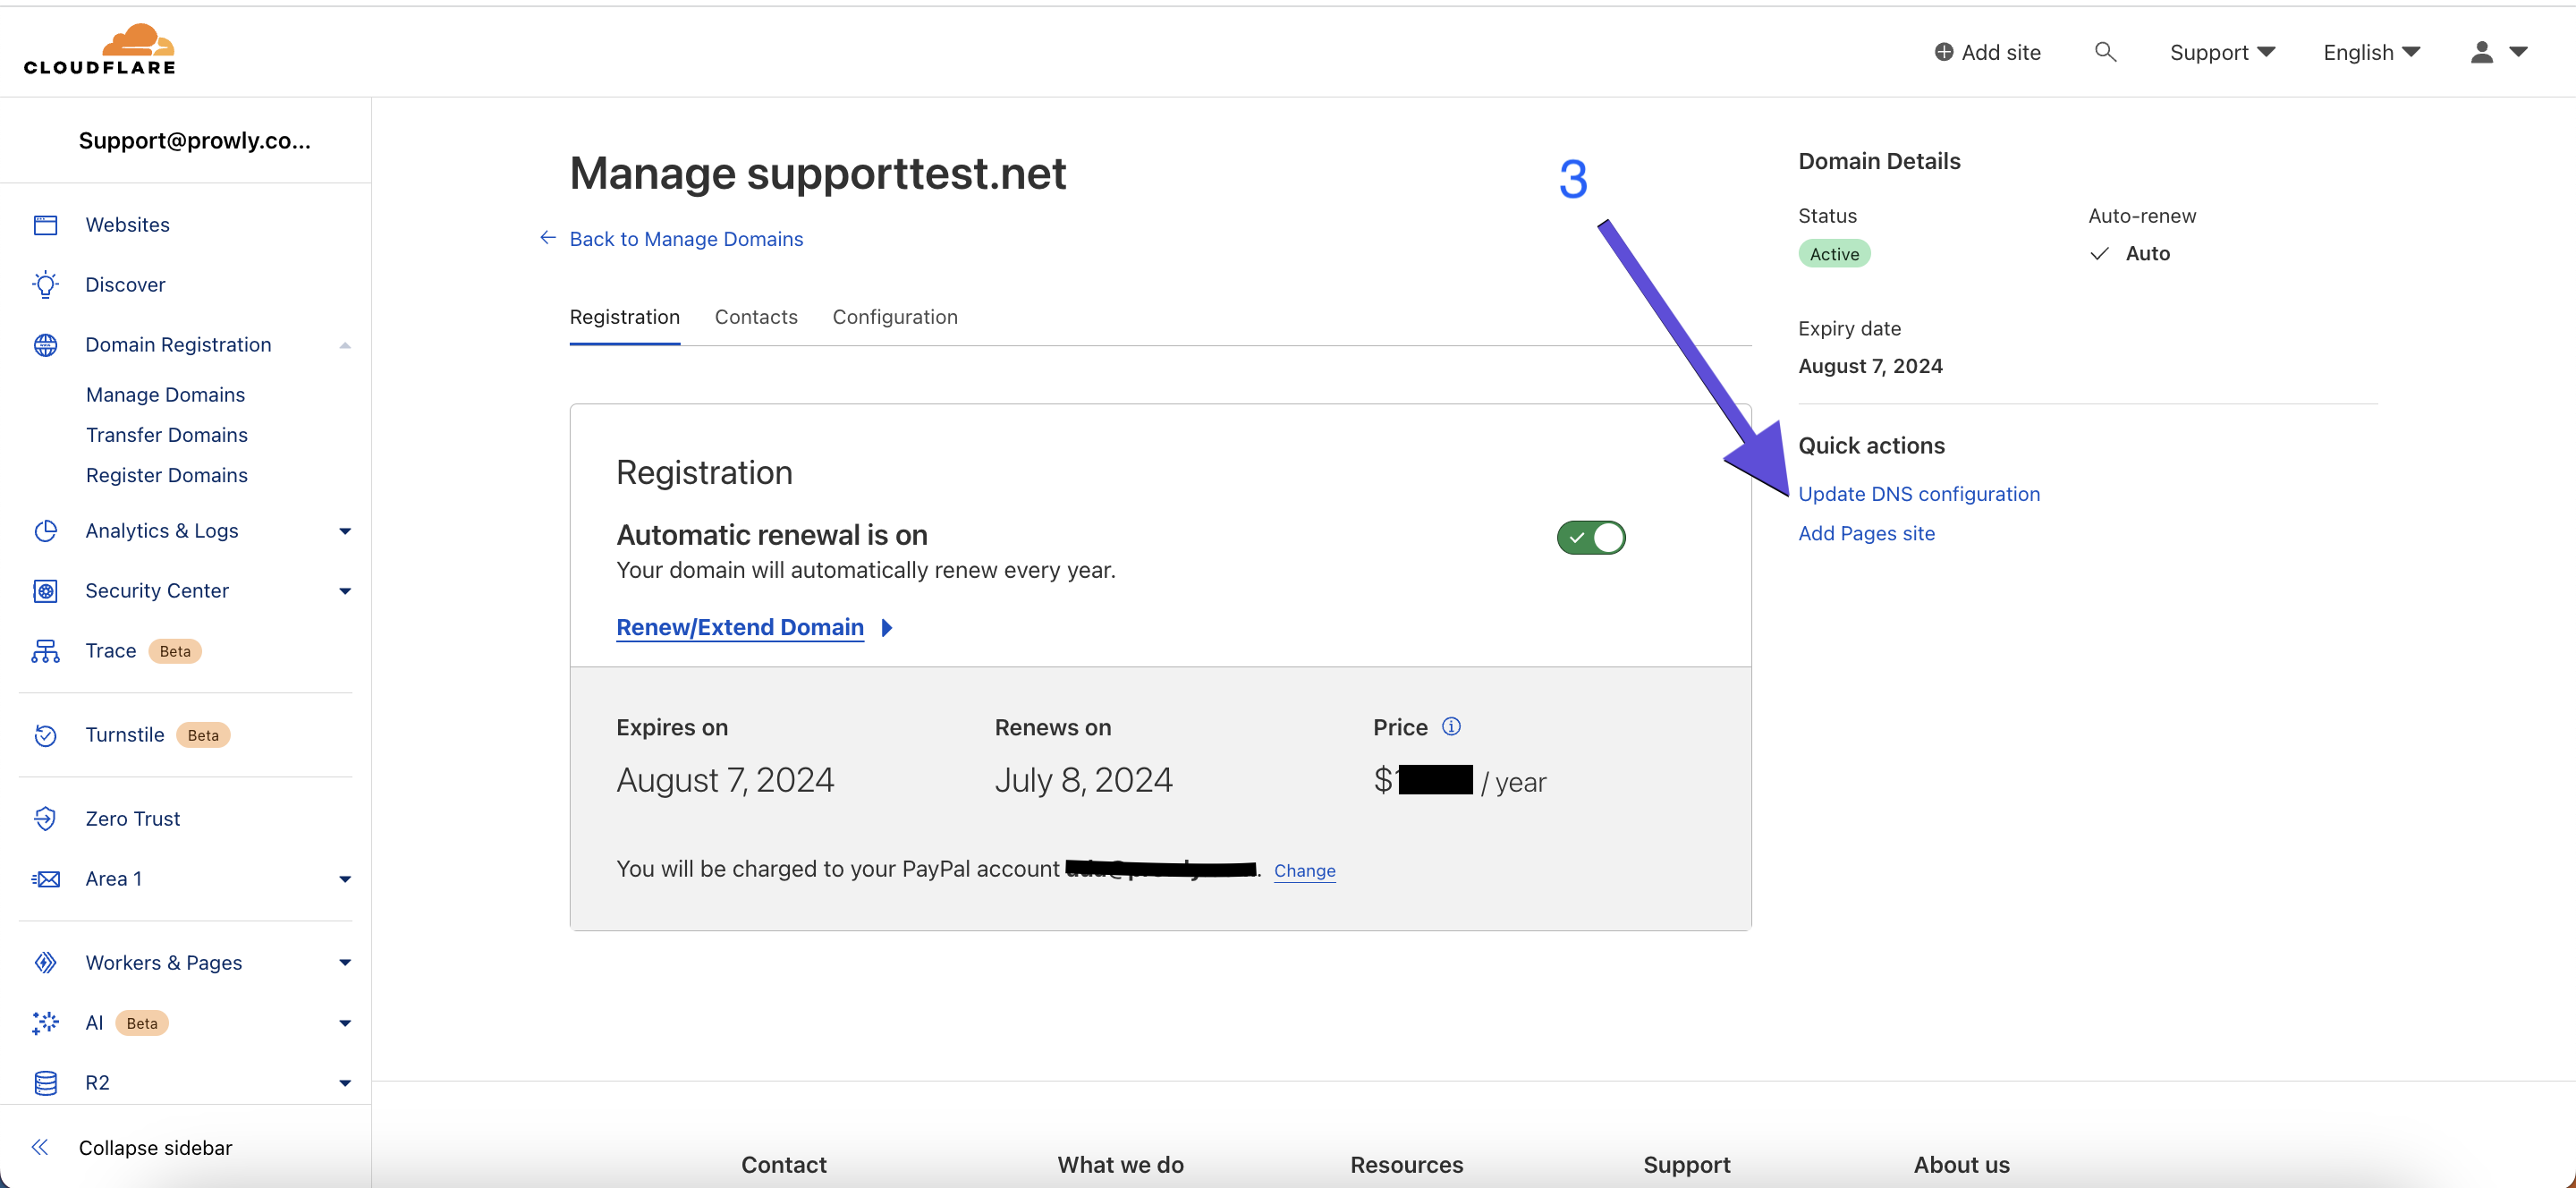
2. Now, as in the Prowly domain authentication screen please insert each of the DNS records one by one as follows:
Parts underlined as green are record types and parts underlined as purple are record names. The texts underlined as grey are record values. These details are different for every domain therefore please treat these screenshots as an example.
This information is very important to configure the DNS records in Cloudflare properly.
In the Cloudflare DNS panel simply click on Add Record and insert each of the records one by one making sure that record types, names, and values as well as proxy status are set properly: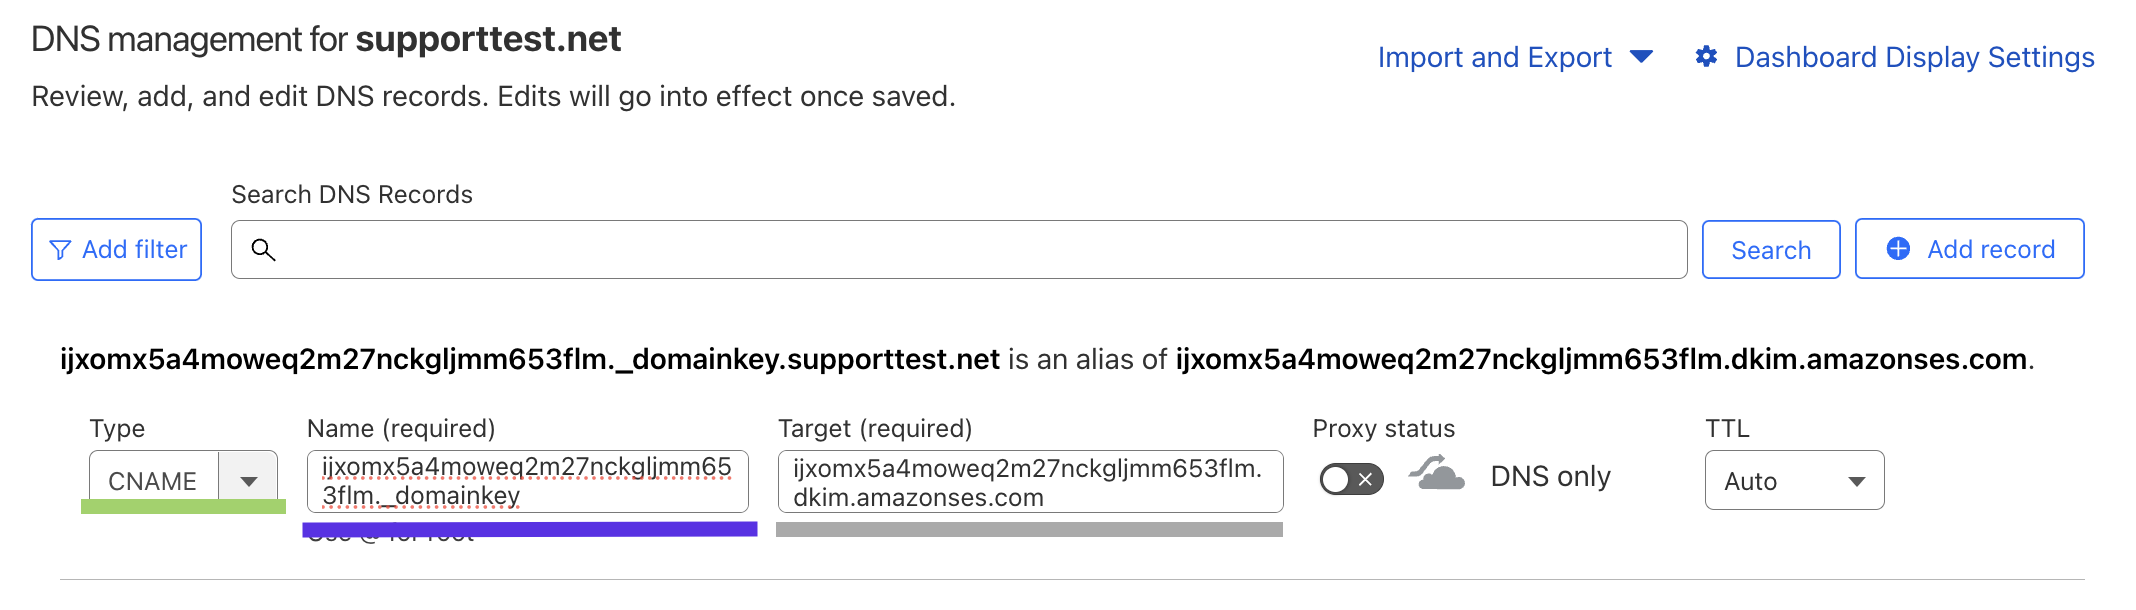
Simply click Add Record and repeat the process for each of the records you see in Prowly.
Note
There's an exception for TXT records in Cloudflare. For the TXT record, you will need to type the At symbol @ instead of your domain name. This will ultimately make this record appear under your domain but that's a requirement in Cloudflare.
Now after you successfully configure all the DNS records, you may need to wait up to 48 hours for all the records to be updated in the DNS zone. This is an inevitable process due to how the propagation of DNS records works.
After that time please go back to the Prowly domain authentication screen and click on Verify configuration. 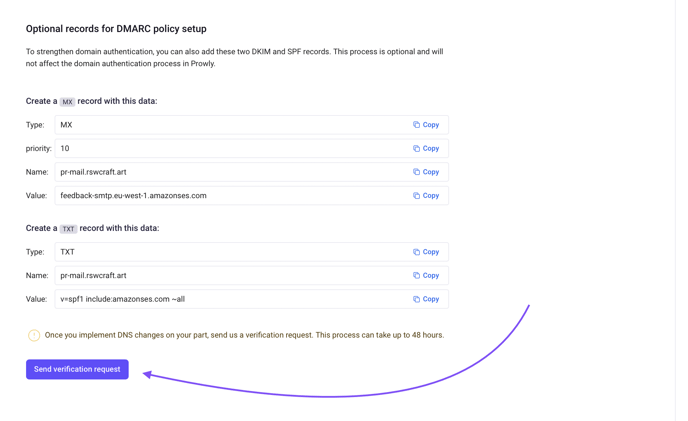
After a short while you should be able to see the screen that your domain has been authenticated properly.