This article contains instructions on how to configure DNS records necessary for domain authentication in Prowly, when your domain provider is Google Domains. If you use any other domain provider or do not know how to enable authentication in Prowly, please refer to this article first.
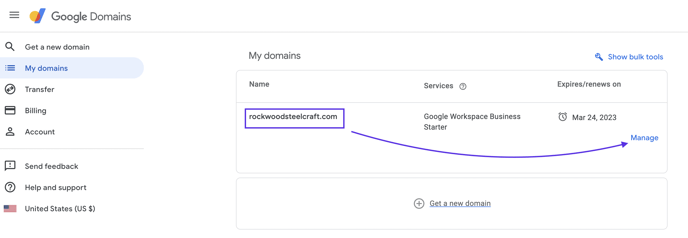
- Log into your Google Domains account.
- Choose the domain you want to authenticate and click the Manage button.
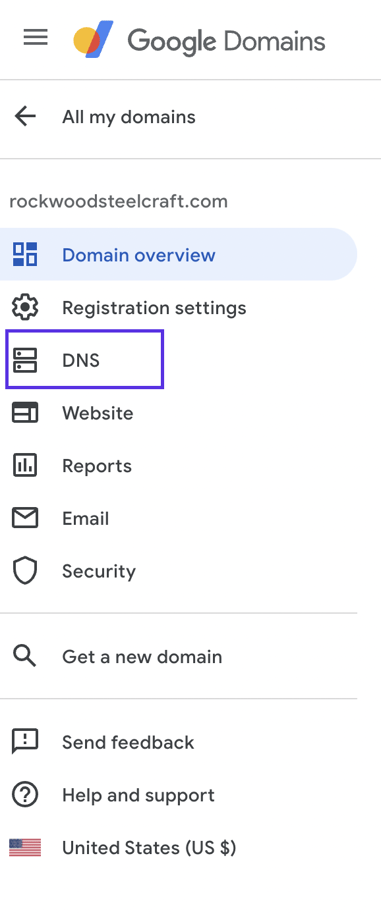
- On the left side menu, choose the DNS section.
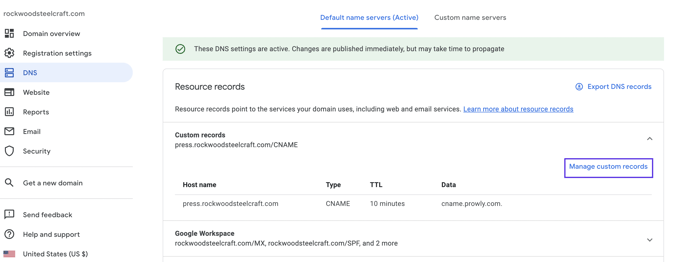
- In the center window choose the Manage custom records button.
- In the next step you will see that every record has four fields that should be filled in:
Host name (record name), Type, TTL(propagation time), and Data (record value).
All the information you will find in Prowly (Account/Email setup/Domain authentication). 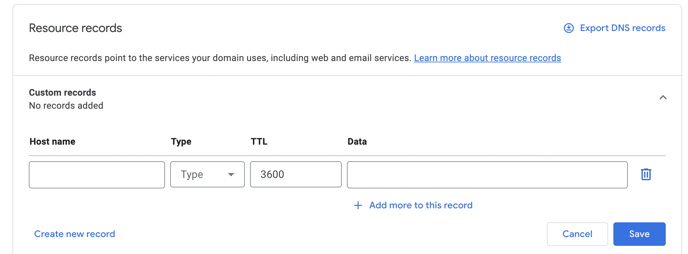
6. Please copy the text from Prowly to your DNS records like in the below pattern:
Green underline - Type of the record, Purple - Name of the record (Host name),
Blue - Value of the record (Data). The TTL filed you can leave as Default. 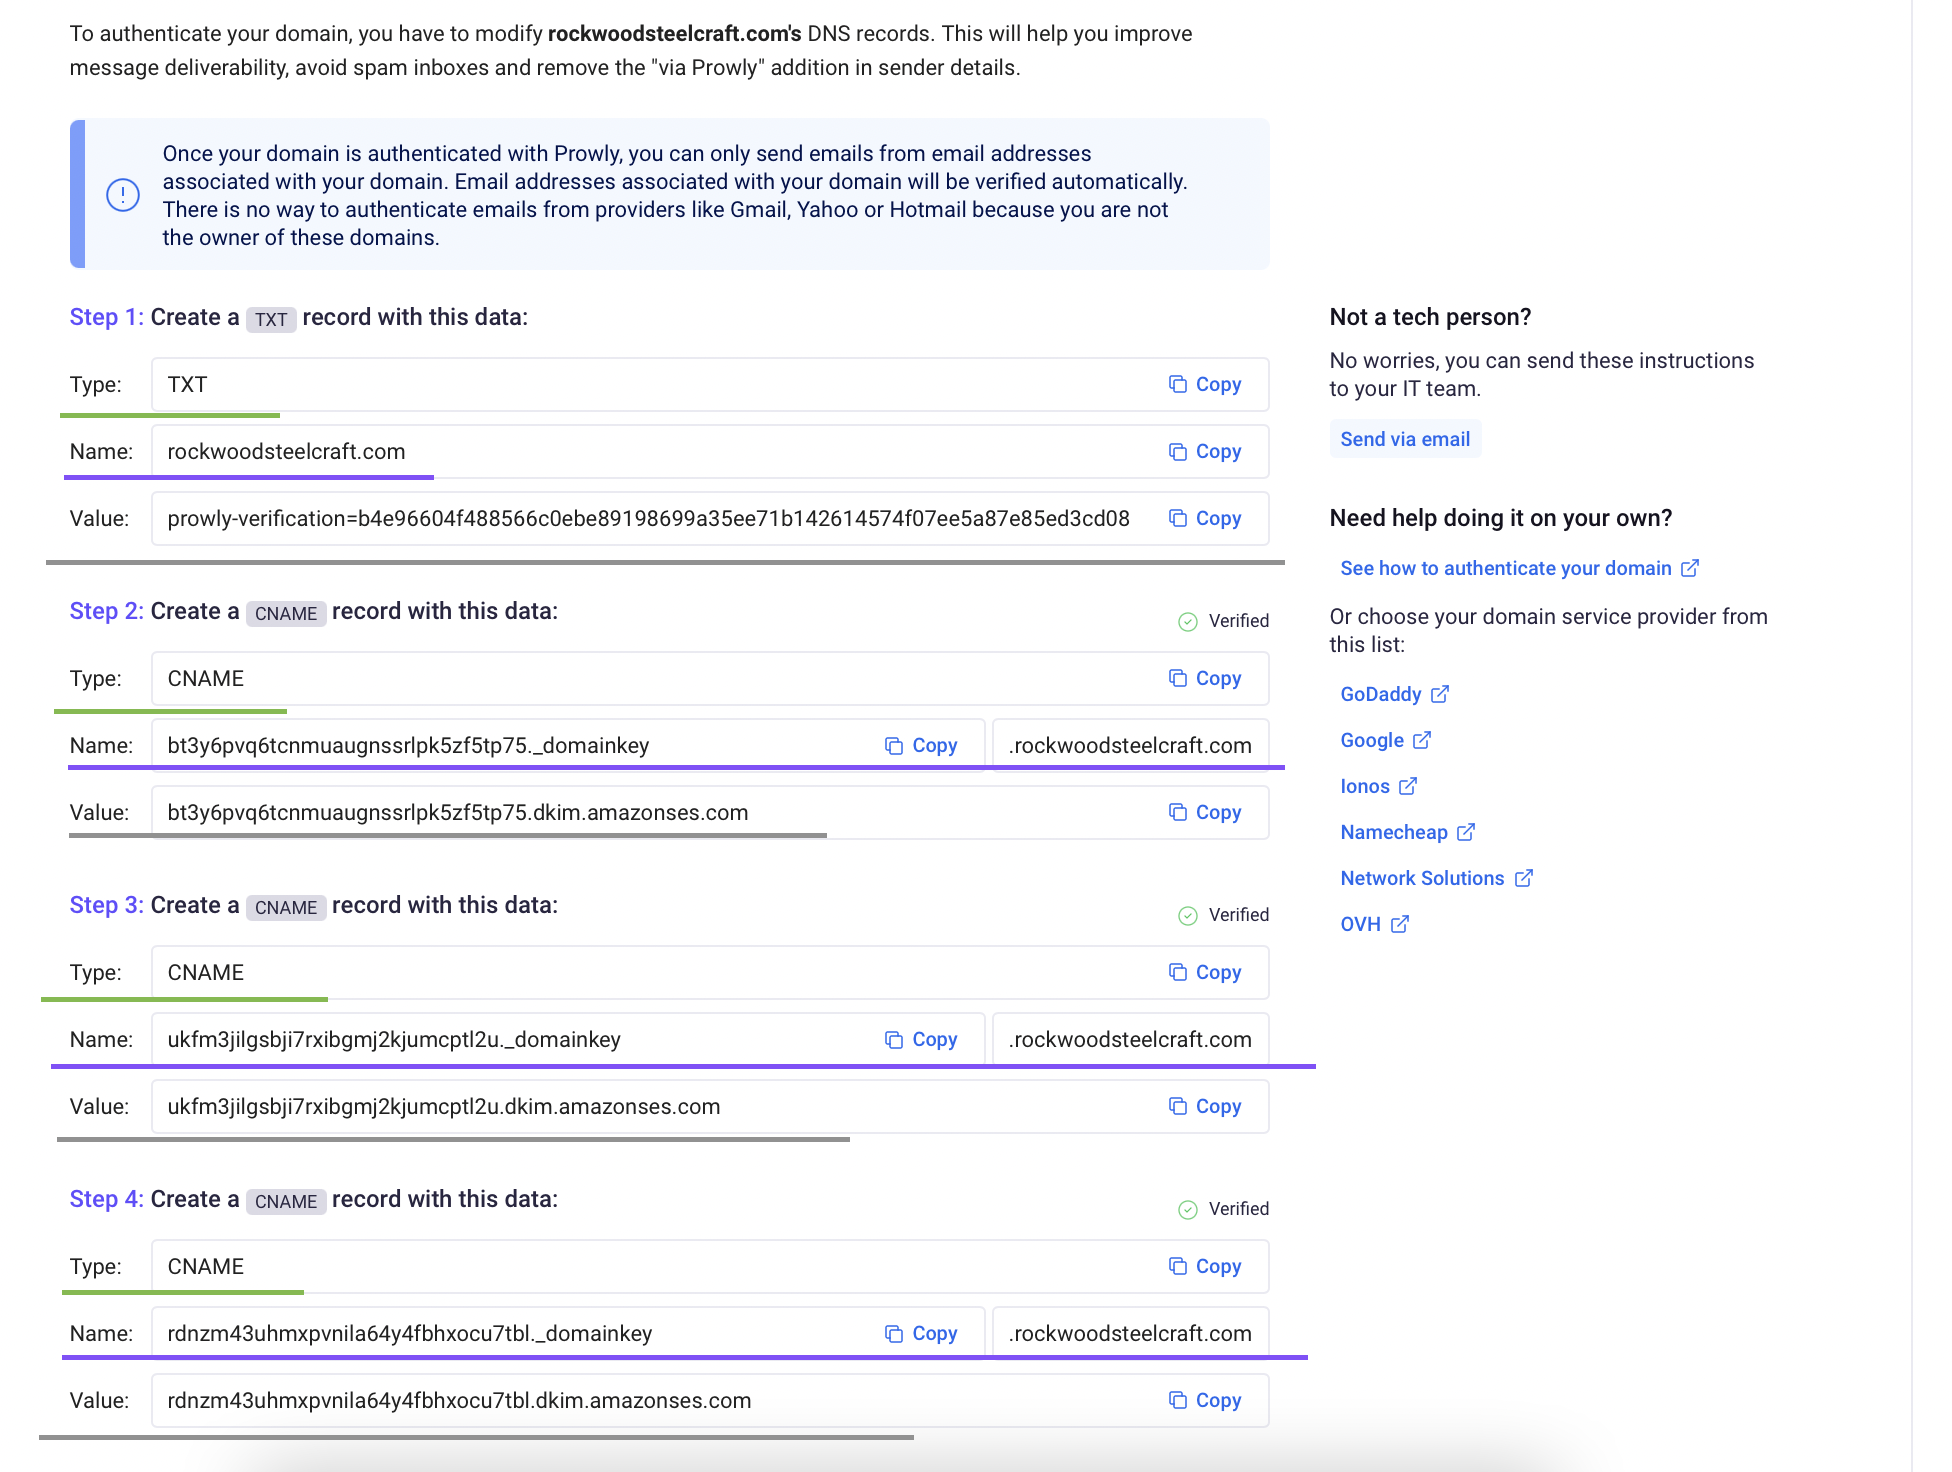
When you fulfill one record then just click Create new record to add the next one:
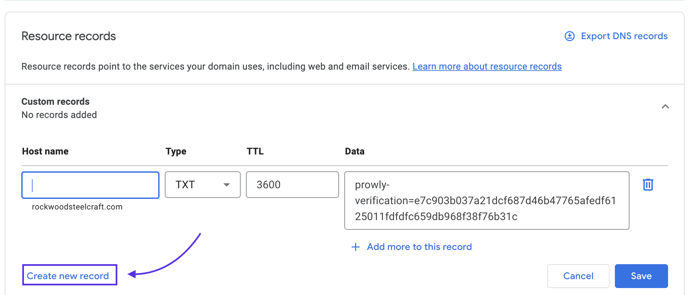
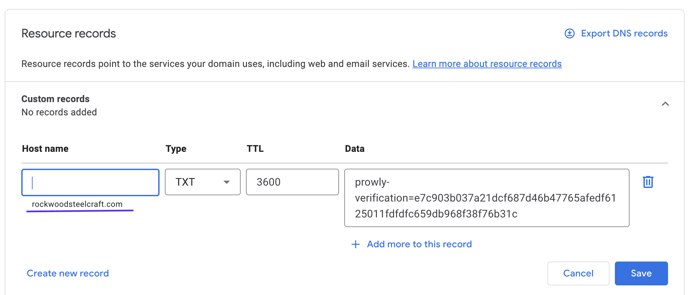
Please, remember that some domain providers add domain names by default so you have to skip this part in the Hostname field like below. You can check it in the preview when you click the Host name field.
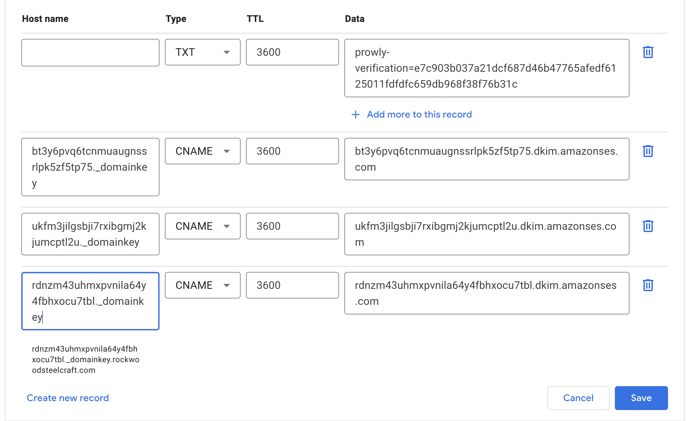
7. When you add all the records, please make double-check if the records are the same between Prowly and your DNS.
Please take a look I skipped the domain name in the Host name field, but my domain provider (Google domains) add it by default and you can see it in the preview under the Host name field. Exactly as mentioned in the previous step.
8. Save the changes in your DNS and wait for the server when will propagate those records. 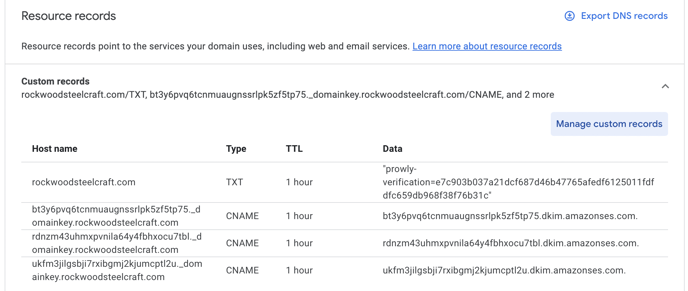
Now after you successfully configure all the DNS records, you may need to wait up to 48 hours for all the records to be updated in the DNS zone. This is an inevitable process due to how the propagation of DNS records works.