Email authentication changes coming in February 2024
There’s a crucial update coming our way in February 2024 from Gmail and Yahoo! regarding email authentication. From this time, both companies have required bulk senders to authenticate their email domains.
This means that starting February 2024, it is mandatory to authenticate your domain in Prowly in order to continue sending emails through our platform.
To be able to send emails via Prowly using your email domain, you have to set up domain authentication first.
In this article, you can read more about:
- What is domain authentication
- What is DNS
- Other terms you might want to know
- How to authenticate your email domain in Prowly
- How to copy all DNS Records into your domain provider admin panel
- Frequently asked questions
What is domain authentication
Domain authentication basically shows email providers that Prowly has your permission to send emails on your behalf. Email service providers (like Google or Microsoft) distrust messages that are sent from unauthenticated domains - simply because there is no assurance that the message really comes from you.
Setting it up can give you at least a couple of benefits:
- Your reputation as a sender increases, which also affects email deliverability and makes your emails less likely to land in spam folders
- Your email recipients will no longer see "via ..." next to the sender address and will be less likely to mark your email as spam
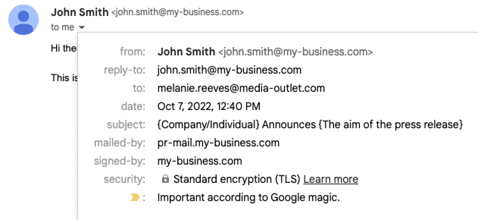
- You will also see your domain (i.e. my-business.com) in the details of the message. Here's what it may look like if your email message gets opened by a recipient using Gmail:
To authenticate your email domain, you have to point DNS entries from your DNS provider (i.e. Cloudflare or Google Public DNS) to Prowly.
Please keep in mind that once your domain is authenticated, you can only use email addresses that are on the already authenticated domain. You can add domains of all sender email addresses you need to use in your email pitches.
What is DNS
DNS stands for Domain Name System, a naming system for domains on the Internet. It translates domain names (i.e. www.prowly.com) to IP addresses.
Your DNS provider (such as Cloudflare or Google Public DNS) is the service that hosts the domain name that you actually want to send your emails from.
With DNS records in place, your recipients' email clients will be able to detect that your email address is indeed connected with the domain you have access to. You will be treated as a trustworthy sender, which should be your priority when sending email campaigns.
Other terms you might want to know
- DKIM (DomainKeys Identified Mail) - a method of validating emails from specific domains, that helps email providers prevent malicious email senders
- SPF (Sender Policy Framework) - an email authentication standard that compares the email sender’s actual IP address to a list of IP addresses authorized to send mail from that domain
- DMARC (Domain-based Message Authentication, Reporting, and Conformance) - a domain policy that authenticates emails along with their senders. It works on top of two other strong authentication protocols: the above-mentioned DKIM and SPF
- CNAME - a record that creates an alias for subdomain.yourdomain.com and points to prowly.com
How to authenticate your email domain in Prowly
1. Start by clicking the gear icon in the top-right corner and click on Email setup.
![]()
2. When you get there, click the Manage domains button in the Domain authentication section.

3. Enter the domain you want to authenticate. This should be a domain you're going to use in your emails as the sender address (also known as the From field). Then click on Continue.
 4. Now you can either Authenticate domain yourself or, if you’re not sure how to do that, you can send a request to your IT support with all the necessary details by clicking on Send to my IT team button on the right or follow the instructions below, based on your domain service provider.
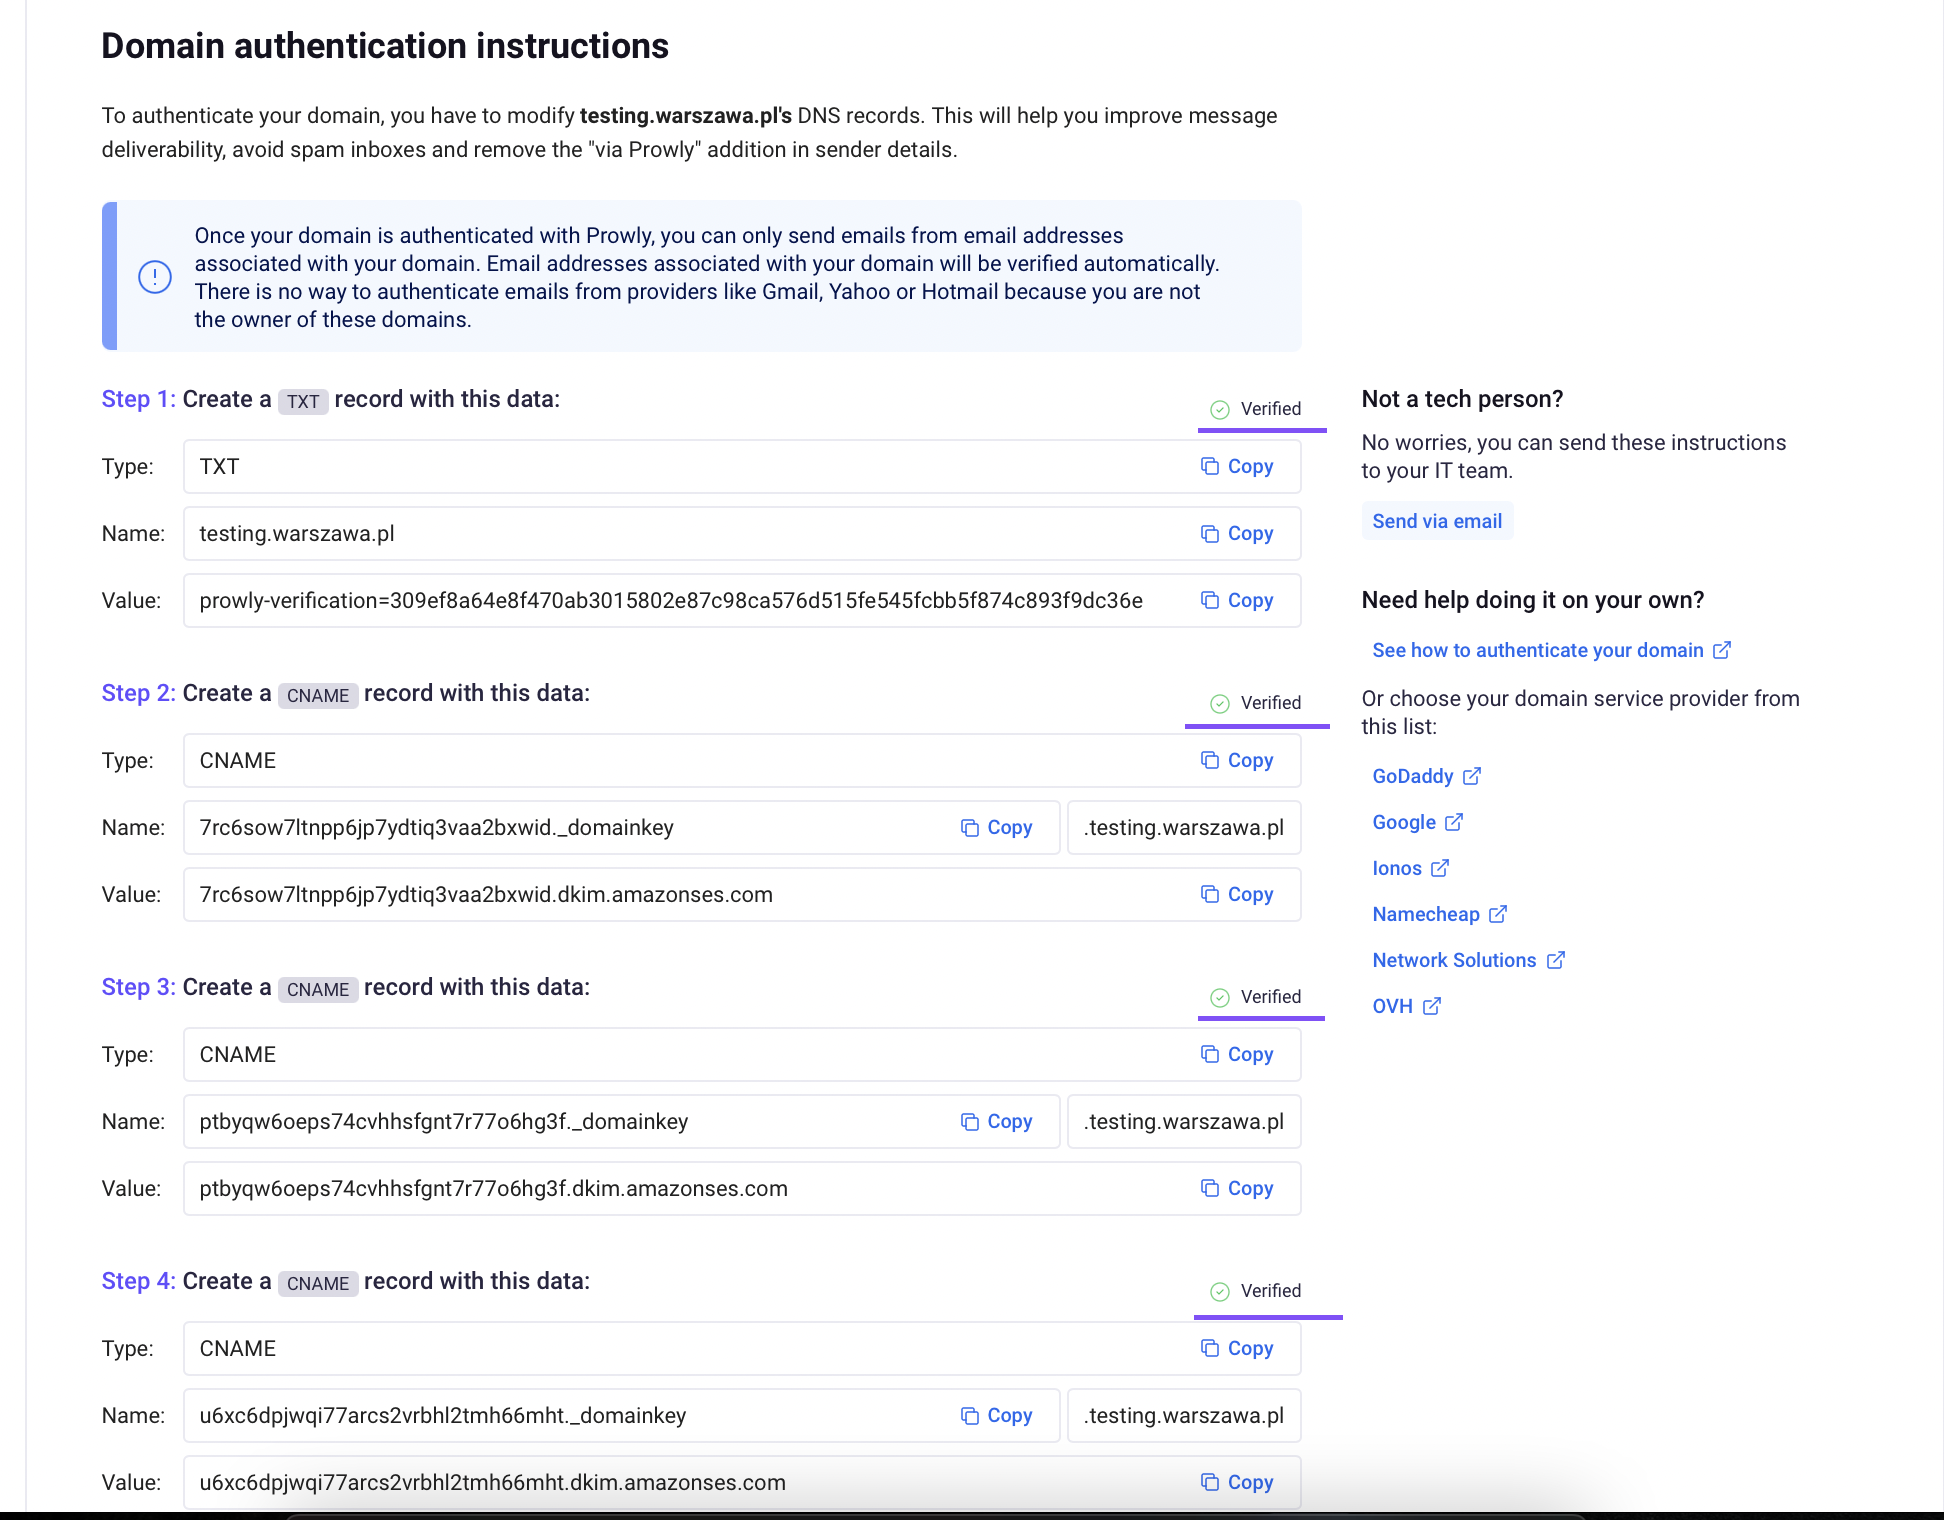
You will be going through 4 steps in which you can see all of the required DNS records which need to be inserted in your domain configuration panel. Copy all DNS Records into your domain provider admin panel (i.e. GoDaddy or Google domain), one-by-one.


5. Once all the records are added properly, click Send authentication request. Keep in mind that DNS changes may take up to 48 hours to propagate, so it can take time to verify your domain. We will send you an email with confirmation when the setup is done.

6. That’s it! When your domain is authenticated, you should see a screen like the one below. At least the first four records should be highlighted in green.
The actual update of your DNS records can take even up to 48 hours. To achieve the best possible email performance, wait for the authorization of your domain before sending out any email campaign with Prowly.
Keep in mind that every DNS provider has a different configuration panel, so if you face some challenges in updating your DNS records, follow the instructions below and don't hesitate to ask their support for help.
How to copy all DNS Records into your domain provider admin panel
Use the instructions below, depending on your domain service provider:
Frequently asked questions
Q: What tools should I get in order to perform domain authentication?
A: You should have access to the domain DNS configuration panel. Probably a technical person from your team should possess it.
Q: Should I turn proxy on the records in DNS?
A: No, when setting up the records, please turn the proxy off. The records need to be visible in the DNS zone.
Q: Should I include a dot at the end of the record name/value?
A: If your domain provider allows it, then yes, it is needed in order to avoid duplicating the domain name at the end of the record.
Q: How should I set up the TXT record?
A: Instead of providing the domain name in the TXT record, please try simply inserting the ‘@’ sign, which is the equivalent of the domain name in domain providers. If it doesn’t allow you to do so, then please input the domain name as usual.
Q: Can I delete the records from my DNS after I have authenticated my domain?
A: No, don't remove any records as long as you continue to use Prowly. Once the records are removed, you will no longer be able to send emails via Prowly.