Discover the pros of organizing your contacts into intuitive and effective media lists.
Media lists are a way to sort, organize and manage your contacts in Prowly. Their main goal is to help you optimize your communication efforts and streamline the process of reaching out to the right people at the right time. With media lists, you can create targeted lists of journalists, influencers, bloggers, and other media professionals who are relevant to your PR campaigns.
Adding contacts to media lists
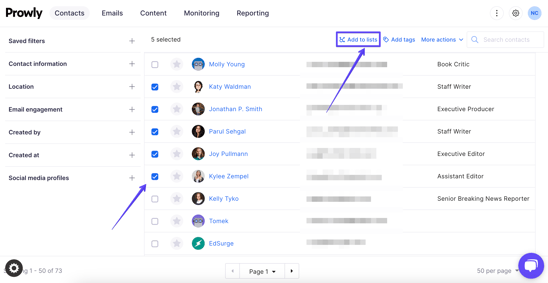
To add contacts to a media list, navigate to Contacts > My Contacts, tick the selected contacts and choose "Add to lists":
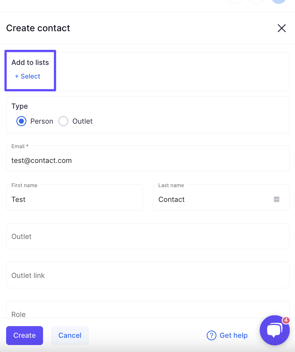
Another way is to assign contacts to certain lists right after adding these contacts to Prowly. In the upper-right corner of the screen, choose "Add Contact". If you want to add contacts manually, select either "Create contact" or "Create multiple contacts". Once you have filled in the contact details, you will be able to choose a list to add them to:
 If you're importing contacts in bulk from a spreadsheet, Prowly also lets you choose a list to add them to. Check this article to learn more.
You can also add contacts to lists straight from the Media Database, where you can find journalists and outlets suitable to your PR needs! Simply choose contacts from the Database, mark them all with a tick and click "Add to list" to save them on your account. To learn more, click here.
Managing media lists
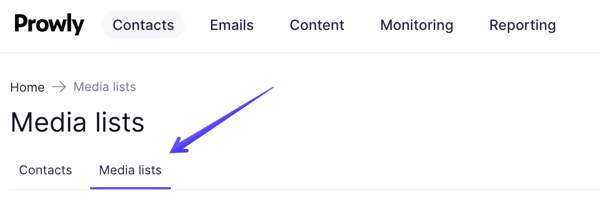
To view all your media lists, navigate to Contacts > Media lists or choose them from the top bar menu visible when you're in My Contacts:
Upon opening it, you will see a view of all your media lists alongside their most important details:
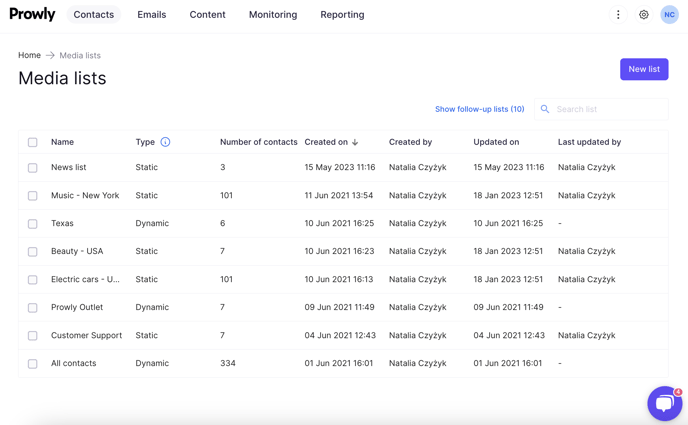
You can see list names, type (static - contains manually added contacts, saved filters - based on filters that you have previously saved), number of contacts each list has, dates they were created and updated on and lastly, names of users that have created and updated them.
By default, Prowly will only show you regular lists, but if you want to extend your view and see also the lists created when sending our personalized follow-ups, click on the blue "Show follow-up lists" text on the right side.
To sort the view, click on the small arrow icon next to the property. You can sort the list by their name, type, date created and updated:
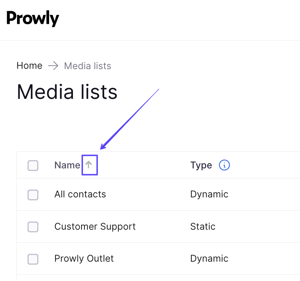 To add a new list, simply click the "New list" button in the upper-right corner. Lists can be deleted by clicking on the trash icon on their right side.
Remember that deleting lists will not delete the contacts on them!
Media list details
To navigate to the details of a media list, simply click on it. Once there, you can freely edit and modify the list and its contents.
You can mark some contacts or choose all of them. Then, you can export them, add them to different lists, assign tags to them, remove them from lists or delete them entirely. On top of that, you can add various filters to the list to help you view only some particular contacts.
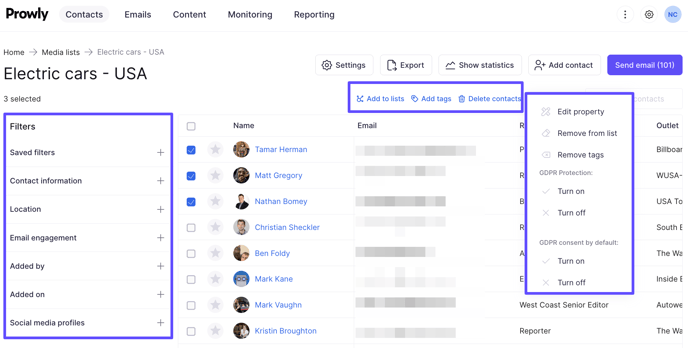
To change the name of the list or delete it entirely, click on the "Settings" button at the top of the view. If you want to add more contacts to it, choose the "Add contact" button and if you want to send a mailing to this particular list, click "Send email".
Make sure to also check out the list's statistics! Click on the "Show statistics" button at the top of the screen to see some useful data on the size and delivery statuses of the list (how many contacts opened, clicked or bounced). Historical data reaches up to the whole previous month. Easily personalize the chart by modifying these two properties:
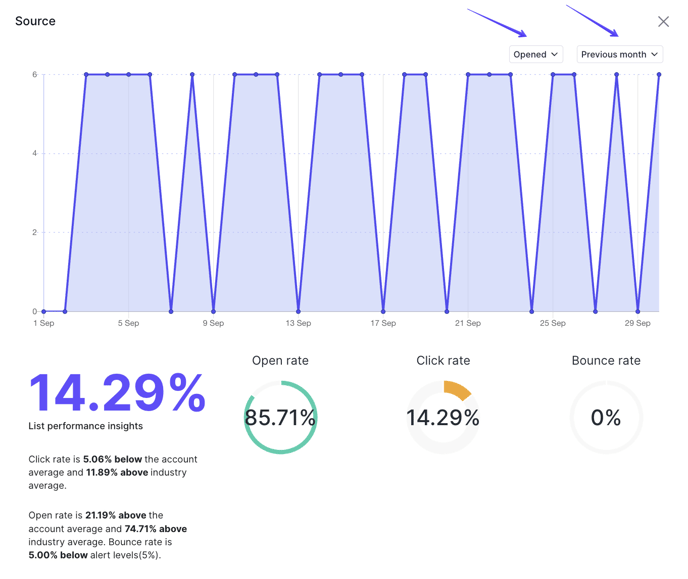
Here in Statistics, you can also see open and click rates for the list, top contacts and mailings sent to the list.